Thursday, May 5, 2011

Do It Yourself : Desert Cooler - 3

Click Rebuilding Desert Cooler  for all related posts.

Today you will be finally able to see at least something lustrous emerging out of the rusty frame!

It is all about cleaning so far. Things got worst when I reached the L bars that made up the frame. Rust there was metaphorically 'knee-deep'. Same was the case with insides of water reservoir where dust and salt deposits had made quite a thick layer.

Needed some Special Work And Tools here!

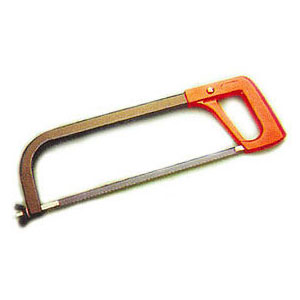
Hand-held grinder came to the rescue with its standard Carborundum wheel for the L bars:
The left side of the image above is about a couple of millimeters thick layer of rust. On the right is what Grinder did to it. Purpose was to remove most of the uneven paint and corroded metal which was served well. I had to topple the frame many times to grind all the 4 bars on all 6 sides of the frame that makes the cooler.

Then came the water reservoir, remember a small grinding pad I told I purchased? This one?:


This time grinder wheel was switched to this one and it did manual sandpapering work in fraction of a time and still lesser effort! Here is the thing at work:
Left is the side that grinder has worked upon, the paint here is not flaking much so did not made much efforts to remove all of it. The layer of grit is however completely gone. Good work Black n Decker! :-)

A note of caution here, the grinder sends the sparks and small pieces of rust flying. The spindle turns at few thousand revolutions per minute. Also the dust is very fine and caused some coughing till I used a cloth to mask myself. Also wore big goofy glasses as well to avoid debris getting into the eyes. Another nuisance is noise. Metal being ground makes so much noise that I owe sincere thanks to all neighbors who put up with the ruckus for three-four hours I was at it.

Then came painting, a thick coat of Red-Oxide primer, 4-5 hrs of curing and then a dull blue for the body and lo! Just click this image for a blown up view:
Pretty satisfying to see a sturdy, neat and shining piece coming up. Painting is going on during the moments stolen from the after office hours. 

Later will be assembling the components together. Mostly tidy work Maybe a major chunk of this weekend will go into these activities. Stay tuned. :-)

By the way, now you can have blog posts delivered to your Inbox via Feed-Burner. Link is on home page of each blog. Or just follow these links to subscribe to respective blogs:

See you again later.
Good night.

Wednesday, May 4, 2011

Do It Yourself : Desert Cooler - 2

Click Rebuilding Desert Cooler  for all related posts.

What you saw in last post here was something that needed some work to fix. I came to know today that the cooler was like 8 years old! For that old piece of equipment, it is a great bargain if it gets up and running in a couple of K bucks!

But first things first. Got to plan!

So many days before I used my first tool on that junk, I had a background process running in my head all the time thinking how-tos of everything I need to fix in there.

So after a rough plan, I made out a list of material I would be needing and reserved a day for shopping for stuff in the hardware market. The list read something like:
 - Coarse  grain sandpaper
 - Fine grain sandpaper
 - Wire brush
 - Red oxide primer
 - PVC Conduit pipes
 - Lubricating oil
 - Turpentine oil
 - 3/4 inch hose
 - 4 ft x 1 ft steel wire mesh
 - Insulation tape
 - Water pump
 - Plastic gardening mesh
 - Fan brackets
 - Wiring for fan and pump
 - Paint
 - Wood shavings wool

etc etc

Some things that I figured out will be useful on the fly like this little fellow:

This is a wood workers grinding wheel made of layers of sandpaper. It can be mounted on to a (my dad's) hand-held grinder. I thought might be useful in some cases. And did it help!


So spent a few hours shopping and I came home with a couple of bags of stuff. The whole stuff cost me less than a couple of thousand rupees and that includes some new tools as well (see that yellow handled cutter in the pic?). I find that pretty fair. How about you?

My family members were not surprised as they knew I am up to something or the other all the time! :-)

The most painful task was now. Cleaning it up and preparing for assembly. That included:
 - Sanding the rust and flaking paint off
 - Cleaning
 - Priming
 - Painting


To my surprise that task was more tedious that I thought it would be. Especially when you are starting from something like this:
Ewww!

My shopping basket had sandpaper to start with but sandpapering proved less effective than scraping the flaking paint off with a used Hack-Saw blade. So this is how it was done:

1. Scrape off the paint


 2. Wipe and clean

 3. Sand off the specks of paint. Its easy because small spots are now very vulnerable

4. As good as new! Paint can protect galvanized metal over 8 years!!

That was the water reservoir by the way. 

The cleaning took much of my weekend (almost all). Now I am waiting to steal some time every now and then to act on my remaining stuff.. These days the thing is undergoing more cleaning and painting and going really well. But more on that later.

Let me know if you like the verbosity of this post.

Good night!

Sunday, May 1, 2011

Do It Yourself : Desert Cooler - 1

Click Rebuilding Desert Cooler  for all related posts.

This weekend was allocated to fix my desert cooler. The act was supposed to be over by the weekend but the thing just went on and on and somewhere around noon today, my body gave in :-( Tired from a combination of dust, grit, thinking and fitting my poor body into so many odd orientations that it is not used to.

Why I took on to fix my own desert cooler rather than getting it fixed from the market? A few things to note:

1. This is definitely the first point, It's FUN! and some exercise too that refreshes you. I mean it. Works for me!
2. Market is too busy as it is the season and I did not want a quick-fix job done. Its hard to get their attention when everyone wants their job done at the earliest.
3. The way they put the wood shavings in leaves lots of dry space and hot untreated air in.
4. Dripping water from here and there keeps on showering the occupants in the front of cooler.
5. Pumps keep getting clogged by the loose wood shavings falling due to poor restraints (mostly couple of bamboo sticks).
6. My cooler frame is too old and needs some serious cleaning/paintwork

and finally, I needed something to satisfy the appetite of the Tweaker inside me:-)


So here is what I had to start with:

An old rusting frame that has not been used for a couple of years. Fan motor stays are broken due to rusting:


The Frame, Water reservoir and some loose hoses. Hoses will thrown away and replaced with something better. And I hate that water pump design. Although they work for a long long time, but they catch rust externally pretty quickly.

And the original Crompton Greaves fan and motor that are still at their best health apart from some dirt a little rust on motor. Will be dismantled, grit removed and internals oiled etc. The original color of the fan is creme by the way!

Then some goals for this cooler that I thought of:

-An elegant water distribution system for the wood wool
-A way to stop wood shavings wool to fall in the water
-Some kind of filter to prevent water pumps and hoses from clogging
-World class workmanship ;-)

Future:
-Float valve for no-drip refilling of water reservoir. Just connect the hose and go to sleep, water will always top up and valve will keep it from flowing over. A common feature in new models these days.

I will be posting more on this as the thing takes shape.

Friday, April 29, 2011

Tom goes whitewashing...

...his desert cooler. :-)

As I said in my last post, my broken, rusted, and ignored desert cooler is growling at me from the balcony each time I pass it by. This weekend is going to be a full blown restoration week...very interesting...already have a list of things to purchase and

It is all the more satisfying when you do something by yourself and then see it work. No one on-hire is going to pay as much attention as much as you can to the thing that you want to get done. Strange as it may seem, it takes much less skills to fix something by yourself than what most of use believe.

The best way to know the skills needed to achieve a minor fix can only be known by attempting it. So tomorrow I will be brushing, sanding and painting the old frame of my cooler. Maybe next weekend it will be ready to roll. I am expecting this overhaul to last at least three seasons without needing any further maitenance.

Enough talk about this cooler task

Few days ago I started to miss my gym! I decided that rather than spending the first month at slow conditioning, I should try to condition myself at home itself and then get a head-start at the gym. But by mistake, I have been a little overenthusiastic the first day of my home routine and the result is that I am sore in most of my muscles now and had to take off for a couple of days. Lesson is that home exercise also has enough potential to train us if done regularly.

I will be happy to share my ideas of home exercise if readers wish to. A half an hour workout for whole major body parts without any props and equipment! Learned that from those months I have been spending in gym over past few years. :-)

So while my muscles recuperate during the night, I will prepare myself for the tomorrows Tweaking. Till I finish that,

See ya!

Monday, April 25, 2011

Rise of the Tweaker

tweak(twk)
tr.v. tweaked, tweak·ing, tweaks
1. To pinch, pluck, or twist sharply.
2. To adjust; fine-tune.
3. To make fun of; tease.

I am a Tweaker by birth. Although the term is not present in Oxford ALD, but defines my cravings for electronic, mechanical and electromechanical stuff very well.

Of the above meanings, my idea of tweaking goes more with the 2nd with added tactics of 1st one to achieve my goals and sometimes the 3rd one as well for recreation. But my subjects are mostly inanimate articles from the long forgotten boxes full of broken inventions and some curious metal and plastic contraptions that tend to stay at home long after their useful period has elapsed due to their virtue of catching the curiosity of a Tweaker like me.

I already have mentioned my other DIY project that is about to jump on the drawing board. Last day one of my as geeky cousin called up to seek my help in rigging up a cheap surveillance system comprising of web cams, motion detectors, limit switches, GSM modules (or cell phone itself) and so on...

Discussed the plan for about one and a half hour and this is what fell into my bucket:
"Write a program to receive Boolean status information from any of the devices connected to a LPT1. The system will then have to take some action based on state of the connected devices. Possibly send a Boolean signal to one of the few signal pins on the LPT1 to trigger a low power relay that in turn triggers a high power relay that powers up an alarm or blah blah blah..."
A dive into this realm of electronics seems to be very fascinating and I am keen to explore more and more of this geeky entertainment. Being a techy, I believe that controlling an LPT should be less pain than trying to impress a girl. Holds true at least for me ;-)

So be sure to find some cool projects coming up soon. That reminds me! Summers are here and I need to fix our desert cooler for the season. Will do this weekend if I can find enough time. Its a lots of work. Again for fun, I am doing it myself, if anything goes wrong, we always have mechanics to fix them ;-)

Well, now I am thinking that mine would be a lucky wife to have a plumber, electrician, mechanic, all in one!

Ahem! Ahem! No self praise!

Okay then. Take care. See you again soon with my first rough rough (yes those are two roughs!) plan of the HLD and stay tuned for this LPT prototype as well.

Good nighties!