Saturday, May 14, 2011

Do It Yourself : Desert Cooler - 5

Click Rebuilding Desert Cooler  for all related posts.

Paint work has cured now and the final pieces are fairly ready to receive the assemblies. Although floor got some stains. I learned from a hardware store owner that these stains can be gotten rid of with some thinner. So that is another post fabrication task on the list.
 Painted and set to receive assemblies
So it was the time for next step. Putting the wood-shavings-wool into the sides.

Now it was quite a hunt to find the wood-shavings-wool...wait a second! Let us give a better name to this 'wood-shavings-wool'. How about just Shavings? Okay then, Shavings it is.

It was quite a hunt to look for Shavings because the roadside vendors are only interested in fitting a small cooler with Shavings and earn seasonal profit. I needed some 3-4 Kgs of it for the cooler and selling that much in bulk by a roadside vendor would be a loss to him because he can manage like 3 small home coolers with that much.

After being unable to convince any of the roadside vendors for a bargain. I assigned the task to my younger brother who arranged the same while I was away at the office from a wholesale market. So I had work to do in the weekend.

Fitting that unruly mass of intertwined wooden laces into those seemed to be a difficult task but I had planned something for it during my earlier brainstorming.

3 Kg of Shavings tied up

The green stuff is what I was talking about. It is mostly used as garden fencing.
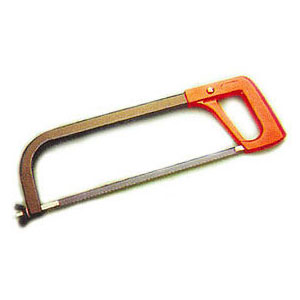
I had measured the dimensions before purchasing and that saved me a lot of wastage. First step was to cut an edge to make it straight. That was easy with the new cutter I purchased.
7, 8 Cut 'em straight.
Once you have a straight edge, it is easy to proceed with the measurements and further cuts.

The plan. Just three perfect sized rectangles are needed
The cutter helped a lot and cut like butter through this plastic. Every other option (scissors, knife, handcraft knife, wire cutter, pliers etc) seem to be more inconvenient than this tool.

Lesson: Invest in a nice tool for excellent results

I am more than happy to have purchased this tool. It just caught my eye at one of the shops where I bought sanding wheel for Grinder

The plan.
and here is the result. Three meshes for three sides.


Then came laying of the Shavings in cooler's side grills. This takes more of an artistic touch of your hand rather than just follow a recipe. The Shavings vary in density, toughness and are very unruly when dry. To make it more manageable I soaked it as I spread it on the grill.

Soak well before use
Then spread it on the steel frame and untangled with my fingers and rearranged it using movements of fingers as if I was fluffing up a pillow before sleeping.

2 min into the it
The aim was to obtain a consistent depth that will be around half an inch when I put slight pressure on it. So loose Shavings if 2-3 inch of thickness will be down to approx 1 inch when we tie them up with that green plastic mesh.

Around 5 minutes

10 minutes and done

Next came the process of tying up the Shavings by sandwiching them between the Cooler's frame and the green Mesh. That was done using simple iron wire that is available at all hardware stores. This wire is commonly used to tie up reinforcements in concrete construction and is order-able by Kilos. 250 gm was enough for me.

I cut this wire into pieces and made approx 3 inch long 'V's from it:

Tying the Shavings
Because shavings are wet as I work on them, they will settle in shape of a nice even pad when they go dry.

Sometimes breeze blew through wet Shavings while I was working on it. It cooled it down, gifting me with small cool blows in hot Sunday balcony as a reward for hard work and as a glimpse of what is about to come when all will be put together. :-)

Use standard pliers to twist the wire. Can be done by hand as well. I tied it at multiple places around 5-7 inches apart.

These custom ties are inserted from outer side and twisted at the inside for safety


More tightening and shortening


And the result:

Outer side of the grill
Inside of the grill with Shavings sandwiched between.

 
Does that qualify as photographic art? :-)
So that is a partially ready cooler with Shavings added to all three sides. The whole procedure took something like 2-3 hours and is far better than what we get in the market. More Shavings, better management and uniformly spread.


Next post will cover the water supply. I went a bit geeky on this one but it was fun as well. Stay tuned and please provide feedback.

Good night!

Saturday, May 7, 2011

Do It Yourself : Desert Cooler - 4

Click Rebuilding Desert Cooler  for all related posts.

Today was the first day of this weekend and as I said in my last post, spent most of the day painting the framework. What relieves me is that after backbreaking effort, the paint is all complete and to my satisfaction. Areas that will be submerged in water got more than two coats and the rest of the portion got whatever came on the 'instructions' label of the paint.

The painted work looks somewhat like this now:


Note the ruggedness on the inch-square grill, that is from the old sediment and rust that was out of scope of cleaning. So painted over it and seems like it will work.

However, I have also been working on components for the final assembly into the cooler, like filter for the pumps, water supply etc. That I will cover later.

Now as finished paint is curing in the balcony overnight, I will be taking off because I have to be a spectator or probably a player in a cricket match organized by the Company's Cricket club.

So I should be off to the bed now. See you tomorrow with lots of more work. :-)

Good night!

Thursday, May 5, 2011

Do It Yourself : Desert Cooler - 3

Click Rebuilding Desert Cooler  for all related posts.

Today you will be finally able to see at least something lustrous emerging out of the rusty frame!

It is all about cleaning so far. Things got worst when I reached the L bars that made up the frame. Rust there was metaphorically 'knee-deep'. Same was the case with insides of water reservoir where dust and salt deposits had made quite a thick layer.

Needed some Special Work And Tools here!

Hand-held grinder came to the rescue with its standard Carborundum wheel for the L bars:
The left side of the image above is about a couple of millimeters thick layer of rust. On the right is what Grinder did to it. Purpose was to remove most of the uneven paint and corroded metal which was served well. I had to topple the frame many times to grind all the 4 bars on all 6 sides of the frame that makes the cooler.

Then came the water reservoir, remember a small grinding pad I told I purchased? This one?:


This time grinder wheel was switched to this one and it did manual sandpapering work in fraction of a time and still lesser effort! Here is the thing at work:
Left is the side that grinder has worked upon, the paint here is not flaking much so did not made much efforts to remove all of it. The layer of grit is however completely gone. Good work Black n Decker! :-)

A note of caution here, the grinder sends the sparks and small pieces of rust flying. The spindle turns at few thousand revolutions per minute. Also the dust is very fine and caused some coughing till I used a cloth to mask myself. Also wore big goofy glasses as well to avoid debris getting into the eyes. Another nuisance is noise. Metal being ground makes so much noise that I owe sincere thanks to all neighbors who put up with the ruckus for three-four hours I was at it.

Then came painting, a thick coat of Red-Oxide primer, 4-5 hrs of curing and then a dull blue for the body and lo! Just click this image for a blown up view:
Pretty satisfying to see a sturdy, neat and shining piece coming up. Painting is going on during the moments stolen from the after office hours. 

Later will be assembling the components together. Mostly tidy work Maybe a major chunk of this weekend will go into these activities. Stay tuned. :-)

By the way, now you can have blog posts delivered to your Inbox via Feed-Burner. Link is on home page of each blog. Or just follow these links to subscribe to respective blogs:

See you again later.
Good night.

Wednesday, May 4, 2011

Do It Yourself : Desert Cooler - 2

Click Rebuilding Desert Cooler  for all related posts.

What you saw in last post here was something that needed some work to fix. I came to know today that the cooler was like 8 years old! For that old piece of equipment, it is a great bargain if it gets up and running in a couple of K bucks!

But first things first. Got to plan!

So many days before I used my first tool on that junk, I had a background process running in my head all the time thinking how-tos of everything I need to fix in there.

So after a rough plan, I made out a list of material I would be needing and reserved a day for shopping for stuff in the hardware market. The list read something like:
 - Coarse  grain sandpaper
 - Fine grain sandpaper
 - Wire brush
 - Red oxide primer
 - PVC Conduit pipes
 - Lubricating oil
 - Turpentine oil
 - 3/4 inch hose
 - 4 ft x 1 ft steel wire mesh
 - Insulation tape
 - Water pump
 - Plastic gardening mesh
 - Fan brackets
 - Wiring for fan and pump
 - Paint
 - Wood shavings wool

etc etc

Some things that I figured out will be useful on the fly like this little fellow:

This is a wood workers grinding wheel made of layers of sandpaper. It can be mounted on to a (my dad's) hand-held grinder. I thought might be useful in some cases. And did it help!


So spent a few hours shopping and I came home with a couple of bags of stuff. The whole stuff cost me less than a couple of thousand rupees and that includes some new tools as well (see that yellow handled cutter in the pic?). I find that pretty fair. How about you?

My family members were not surprised as they knew I am up to something or the other all the time! :-)

The most painful task was now. Cleaning it up and preparing for assembly. That included:
 - Sanding the rust and flaking paint off
 - Cleaning
 - Priming
 - Painting


To my surprise that task was more tedious that I thought it would be. Especially when you are starting from something like this:
Ewww!

My shopping basket had sandpaper to start with but sandpapering proved less effective than scraping the flaking paint off with a used Hack-Saw blade. So this is how it was done:

1. Scrape off the paint


 2. Wipe and clean

 3. Sand off the specks of paint. Its easy because small spots are now very vulnerable

4. As good as new! Paint can protect galvanized metal over 8 years!!

That was the water reservoir by the way. 

The cleaning took much of my weekend (almost all). Now I am waiting to steal some time every now and then to act on my remaining stuff.. These days the thing is undergoing more cleaning and painting and going really well. But more on that later.

Let me know if you like the verbosity of this post.

Good night!

Sunday, May 1, 2011

Do It Yourself : Desert Cooler - 1

Click Rebuilding Desert Cooler  for all related posts.

This weekend was allocated to fix my desert cooler. The act was supposed to be over by the weekend but the thing just went on and on and somewhere around noon today, my body gave in :-( Tired from a combination of dust, grit, thinking and fitting my poor body into so many odd orientations that it is not used to.

Why I took on to fix my own desert cooler rather than getting it fixed from the market? A few things to note:

1. This is definitely the first point, It's FUN! and some exercise too that refreshes you. I mean it. Works for me!
2. Market is too busy as it is the season and I did not want a quick-fix job done. Its hard to get their attention when everyone wants their job done at the earliest.
3. The way they put the wood shavings in leaves lots of dry space and hot untreated air in.
4. Dripping water from here and there keeps on showering the occupants in the front of cooler.
5. Pumps keep getting clogged by the loose wood shavings falling due to poor restraints (mostly couple of bamboo sticks).
6. My cooler frame is too old and needs some serious cleaning/paintwork

and finally, I needed something to satisfy the appetite of the Tweaker inside me:-)


So here is what I had to start with:

An old rusting frame that has not been used for a couple of years. Fan motor stays are broken due to rusting:


The Frame, Water reservoir and some loose hoses. Hoses will thrown away and replaced with something better. And I hate that water pump design. Although they work for a long long time, but they catch rust externally pretty quickly.

And the original Crompton Greaves fan and motor that are still at their best health apart from some dirt a little rust on motor. Will be dismantled, grit removed and internals oiled etc. The original color of the fan is creme by the way!

Then some goals for this cooler that I thought of:

-An elegant water distribution system for the wood wool
-A way to stop wood shavings wool to fall in the water
-Some kind of filter to prevent water pumps and hoses from clogging
-World class workmanship ;-)

Future:
-Float valve for no-drip refilling of water reservoir. Just connect the hose and go to sleep, water will always top up and valve will keep it from flowing over. A common feature in new models these days.

I will be posting more on this as the thing takes shape.