Content warning: Understanding all content of this post requires knowledge of theory of direct variation, volumetric calculations, and some thermodynamics. Reader discretion is advised ;-)
After the Shavings have been added to the cooler it was time to have water supply in place. Though a simple thing, I went a bit geeky on this just for sake of entertainment and some perfection in the system.
From past of this cooler it was known that standard pump is not enough to provide water to all the sides. It used to leave dry patches in the sides that allowed hot untreated air in. So an effective system was a requirement.
I went to the market and found that a new submersible pump was in use now instead of earlier centrifugal pump that had a shaft and impeller submerged in water with motor held above water level.
Wanted no risks so I decided to install two pumps! Sounds like overkill but with two goals in mind it seemed to be a good decision:
So two circuits, because the pumps are similar, the area to feed had to be same size. A cooler has three sides. That means one and a half side per pump.
That decided, next was the design of a water drip system that will let the water onto the sides stuffed with Shavings.
The traditional coolers have a V shaped metal strip attached to each side of the cooler and hoses emanating from a distribution joint drop into these metal strips. That arrangement seemed too ad-hoc. Mainly because they are untidy and rickety. Rejected!
I decided to use PVC conduit pipes for the same and cut them according to the need of three sides:
Because each water pump will irrigate only one and a half sides, the top pipe here was cut into half. The cooler fan will be on the open side (here facing downwards).
I thought that making holes in these pipes will be enough. But then I head someone say "Houston, we have a problem!". I reckoned that there could be at least three problems with making holes:
1. and 2: Holes should be just enough so that the supply-drain equilibrium is met as closely as possible.
For calculating this I set up the pump with a temporary hose to supply water at similar height as it would have to when installed finally. Approx 3'6".
Then used a stop-watch to measure the time needed to pump a fixed quantity of water to that height. Used a measuring cup that came with microwave over for this. In this case it was 250 CC in 3.5 to 4 seconds. Time averaged to 3.8 seconds and 65.8 CC per second per pump of supply was the magic number.
Now I needed to know how much water can be drained out of a 3mm hole in that PVC pipe when water is being supplied almost at the same level as the pipe. 3 mm was chosen because that seems to be a reasonable size and will not clog very often.
So I sealed a test-pipe at both ends, made a hole in the top and on the bottom side made three 3 mm holes. Poured water from the top and used the same measuring device and stopwatch to find the time that 3 holes take to drain same amount of water. It came out to be around 23 seconds, that is 10.9 CC per second and 3.62 CC per hole per second of natural, unforced flow.
[Don't complain about the numbers. You were warned in the beginning of this post ;-). BTW it is just high school mathematics!]
Thus by dividing supply per pump (65.8 CC per second) with the drain per hole (3.62 CC per second) I got the total number of holes that will be needed (per pump) to balance supply-drain equation. That comes out to be 18.15. I decided to make that 20 to compensate for some clogging due to deposits or dirt etc.
Also 20 holes are easier to make than 18.15 holes...he he
That was the total number of holes. But I have a length to distribute it upon (one and a half side of cooler). The sides are not continuous. I have one full side and one half side. So I cannot just get the separation between consecutive holes by dividing full length with 20 (and compensating for Fencepost error). So I calculated the number of holes to be made in each full and half side based on the ratio of total length (one side + half side) to the ratio of each side's length.

In the image below (click to enlarge), 94 cm is the total length (one full side of 58.5 cm + one half side of 35.5 cm). 7.5 and 12.4 are the number of holes distributed on the basis of proportion of each side to the total length.
The holes had to be integers. Else how do you make 12.4 holes or 7.5 holes measuring 3 mm each?
Rounded up the above number of holes to obtain two set of possible combinations as follows:
The combination that will place holes more equidistant will distribute water more evenly on the sides. By dividing each length to the number of holes to be made in it, I get the gap at which the holes should be made.
8 and 12 hole combination gave me best distribution of gap (5 cm on longer side and and 5.3 cm on half side) while 7 and 13 holes suggested that I make holes closer together on the longer side at 4.8 cm and farther away on the half side at 5.9 cm. Evidently the latter being not a very good distribution.
Rest of the things were straight forward. Make the markings and pick up the drill with a 3 mm bit. So here we go:
Then comes drilling. 20 holes per one and a half side. Total 40 holes for all sides!
But then came another question. How to cover the edge of the pipes? Water will just fall out on the edges without going through the holes. Also I did not want to seal the sides permanently because there is a fair enough chance that someday they will require cleaning.
I came across an idea and started collecting material for it. A piece of rubber bought from a roadside cobbler for 30 and a curtain holder.
Follow the captions below to see how it was done.
These round plugs are easy to remove and easy to install. I tested them and they do not allow water to escape from the edges.
Now I have pipes with just enough holes to let the water through at the same rate as pumps will pump it into them.
But where will water enter these pipes? More holes!
That, very soon but in another post!
After the Shavings have been added to the cooler it was time to have water supply in place. Though a simple thing, I went a bit geeky on this just for sake of entertainment and some perfection in the system.
From past of this cooler it was known that standard pump is not enough to provide water to all the sides. It used to leave dry patches in the sides that allowed hot untreated air in. So an effective system was a requirement.
I went to the market and found that a new submersible pump was in use now instead of earlier centrifugal pump that had a shaft and impeller submerged in water with motor held above water level.
Wanted no risks so I decided to install two pumps! Sounds like overkill but with two goals in mind it seemed to be a good decision:
- Irrigate the Shavings well to have more air molecules interact with water and after some more thermodynamics, better cooling.
- No dry spots in the sides so that there is no untreated air entering the room.
So two circuits, because the pumps are similar, the area to feed had to be same size. A cooler has three sides. That means one and a half side per pump.
That decided, next was the design of a water drip system that will let the water onto the sides stuffed with Shavings.
The traditional coolers have a V shaped metal strip attached to each side of the cooler and hoses emanating from a distribution joint drop into these metal strips. That arrangement seemed too ad-hoc. Mainly because they are untidy and rickety. Rejected!
I decided to use PVC conduit pipes for the same and cut them according to the need of three sides:
! |
| One and a half side for each pump |
Because each water pump will irrigate only one and a half sides, the top pipe here was cut into half. The cooler fan will be on the open side (here facing downwards).
I thought that making holes in these pipes will be enough. But then I head someone say "Houston, we have a problem!". I reckoned that there could be at least three problems with making holes:
- If I make too many holes, water will never reach the holes on far side of the pipes. The holes closest to pump inlet will drain all the water and Shavings will go dry at the end, violating goal 2 (no dry spots).
- Too few holes will make the pipes flood with water and reduce the efficiency of the irrigation system because while the pumps are pushing more water, the holes just cant get it to the Shavings. (goal 1: enough water)
- Third problem was that the holes might get clogged due to dust and falling of wood-shavings over time and being sucked into the pumps. Has been happening with this cooler in its original design.
1. and 2: Holes should be just enough so that the supply-drain equilibrium is met as closely as possible.
For calculating this I set up the pump with a temporary hose to supply water at similar height as it would have to when installed finally. Approx 3'6".
Then used a stop-watch to measure the time needed to pump a fixed quantity of water to that height. Used a measuring cup that came with microwave over for this. In this case it was 250 CC in 3.5 to 4 seconds. Time averaged to 3.8 seconds and 65.8 CC per second per pump of supply was the magic number.
Now I needed to know how much water can be drained out of a 3mm hole in that PVC pipe when water is being supplied almost at the same level as the pipe. 3 mm was chosen because that seems to be a reasonable size and will not clog very often.
So I sealed a test-pipe at both ends, made a hole in the top and on the bottom side made three 3 mm holes. Poured water from the top and used the same measuring device and stopwatch to find the time that 3 holes take to drain same amount of water. It came out to be around 23 seconds, that is 10.9 CC per second and 3.62 CC per hole per second of natural, unforced flow.
[Don't complain about the numbers. You were warned in the beginning of this post ;-). BTW it is just high school mathematics!]
Thus by dividing supply per pump (65.8 CC per second) with the drain per hole (3.62 CC per second) I got the total number of holes that will be needed (per pump) to balance supply-drain equation. That comes out to be 18.15. I decided to make that 20 to compensate for some clogging due to deposits or dirt etc.
Also 20 holes are easier to make than 18.15 holes...he he
That was the total number of holes. But I have a length to distribute it upon (one and a half side of cooler). The sides are not continuous. I have one full side and one half side. So I cannot just get the separation between consecutive holes by dividing full length with 20 (and compensating for Fencepost error). So I calculated the number of holes to be made in each full and half side based on the ratio of total length (one side + half side) to the ratio of each side's length.

In the image below (click to enlarge), 94 cm is the total length (one full side of 58.5 cm + one half side of 35.5 cm). 7.5 and 12.4 are the number of holes distributed on the basis of proportion of each side to the total length.
The holes had to be integers. Else how do you make 12.4 holes or 7.5 holes measuring 3 mm each?
Rounded up the above number of holes to obtain two set of possible combinations as follows:
- Longer side 13 holes and shorter side 7 holes for a total of 20
- Longer side 12 holes and shorter side 8 holes for a total of 20 again
 |
| Calculations. I never thought I will be presenting them here so did on a rough page only. |
The combination that will place holes more equidistant will distribute water more evenly on the sides. By dividing each length to the number of holes to be made in it, I get the gap at which the holes should be made.
8 and 12 hole combination gave me best distribution of gap (5 cm on longer side and and 5.3 cm on half side) while 7 and 13 holes suggested that I make holes closer together on the longer side at 4.8 cm and farther away on the half side at 5.9 cm. Evidently the latter being not a very good distribution.
Rest of the things were straight forward. Make the markings and pick up the drill with a 3 mm bit. So here we go:
 |
| Standard compass to measure the gap |
 |
| Start little offset from the side. Water will flow on either side of holes. |
 |
| Mark the gaps. Compass helps maintain distance. Guide line helps in alignment. |
 |
| At your mark(s) |
Then comes drilling. 20 holes per one and a half side. Total 40 holes for all sides!
 |
| 3 mm drill, vice and concentration |
 |
| All done |
But then came another question. How to cover the edge of the pipes? Water will just fall out on the edges without going through the holes. Also I did not want to seal the sides permanently because there is a fair enough chance that someday they will require cleaning.
 |
| What goes here? |
I came across an idea and started collecting material for it. A piece of rubber bought from a roadside cobbler for 30 and a curtain holder.
Follow the captions below to see how it was done.
 |
| Bought this piece of rubber mat from a cobbler |
 |
| This curtain rod holder was just right thing for the job |
 |
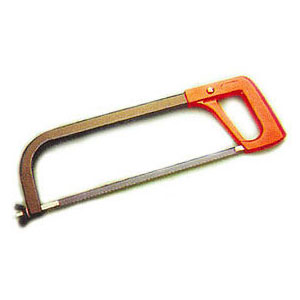
| Filed the edges using a round edge file to make a cutting edge |
 |
| wedged the curtain rod holder and the rubber sheet between two pieces of wood in a vice |
 |
| Tighten and tighten and you have your own mini cutting press! |
 | |
| Perfectly round and just over-sized rings to fit snugly |
 |
| That's it! Now I needed more of them for all open edges |
 |
| Another challenge overcome :-) |
Now I have pipes with just enough holes to let the water through at the same rate as pumps will pump it into them.
But where will water enter these pipes? More holes!
That, very soon but in another post!
Take care


